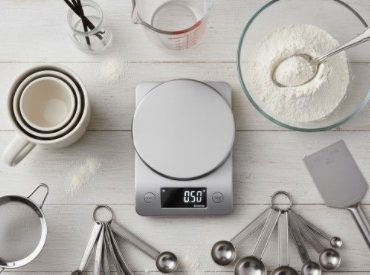

Mastering pastry dough preparation requires understanding the delicate balance between science and touch. The process transforms simple ingredients—flour, fat, and water—into ethereal layers through precise technique and temperature control. Whether creating flaky puff pastry or tender shortcrust, successful preparation hinges on respecting ingredient chemistry while developing the tactile intuition that separates good bakers from great ones.
This is the guide that covers all the knowledge you should have about the pastry dough making, what ingredients to use, how to knead it, what temperature to use and what mistakes should be avoided.
1. Understanding the Science Behind Pastry Dough
Pastry dough is composed of three simple components, which include flour, fat, and water. They are put together in an appropriate way and create a finely-woven net that provides pastry with its lightness, flakiness, and melt-in-your-mouth texture.
The pastry dough preparation is magical as it consists of the following ingredients interacting:
- Flour provides structure through gluten formation.
- Fat coats flour particles to limit gluten, creating tenderness.
- Water activates gluten and steam, helping layers puff and crisp.
Mastering how these three work together determines whether your pastry turns out crisp and airy or dense and chewy.
2. Choosing the Right Flour
Different flours affect texture. In pastry dough preparation, the protein content of flour dictates gluten strength:
- All-purpose flour (10–12% protein): Ideal for most pastries; gives balance between structure and tenderness.
- Pastry flour (8–9% protein): Creates softer, more delicate crusts for tarts and pies.
- Bread flour (12–14% protein): Too strong for pastries, use sparingly unless structure is desired.
For flaky pastries, lower protein flours are best since they prevent excessive gluten development, keeping the dough tender and crumbly.
3. The Role of Fat: Butter, Shortening, and Lard
Fat is the soul of pastry. It’s what gives that irresistible flakiness and rich flavor. The choice of fat in pastry dough preparation dramatically influences the final result:
- Butter: Offers superior flavor and light texture. The water content (around 15–20%) helps generate steam for flakiness.
- Shortening: Has no water, producing ultra-tender but less flavorful pastries.
- Lard: Creates exceptionally flaky layers but has a strong taste, so use in savory pastries.
Most bakers prefer cold butter for its balance of texture and taste. Keeping fat cold ensures it doesn’t blend completely into the flour, those tiny butter chunks later melt in the oven, creating the signature flaky layers.
4. The Cold Factor: Why Temperature Matters
The most important golden rule of pastry dough preparation is the following: Keep everything cold.
This causes butter to melt beforehand and be absorbed into the flour resulting in greasy or hard pastry when ingredients are left warm. Cold butter, however, remains solid until the baking process and emits steam to form air holes and flakiness.
To ensure temperature control:
- Chilled butter and cold water are used.
- Cool the mixing bowl and equipment.
- Let the dough rest in the refrigerator and roll the dough.
The bakers working professionally usually say, cold dough, hot oven, and that is so justified. The contrast of temperatures is the secret of puff perfection and modelling.
5. Hydration: The Balancing Act
Water is a friend and an enemy in the pastry dough making. Add too little and the dough will not hold together, add too much and gluten is formed and makes the pastry tough.
It is a good rule to add water only slowly, till enough to make the dough stick. A spray bottle is used by many bakers in order to be precise. It is not stickiness that is desired, but moisture. To add extra tenderness, substitute some of the water with milk or an egg yolk, both to add texture and flavor as well as counteracting gluten activity.
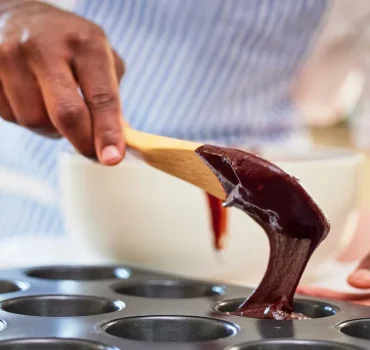
6. Mixing and Handling the Dough
When preparing pastry, the less you handle it, the better. Overmixing activates gluten, which can ruin delicate layers.
Here’s a simple process for most pastry dough preparation methods:
- Cut in the fat – Use a pastry cutter or fingertips to blend butter into flour until pea-sized crumbs form.
- Add liquid gradually – Sprinkle cold water or milk and mix lightly.
- Form the dough – Gather into a ball; avoid kneading.
- Chill – Wrap in plastic and refrigerate for at least 30 minutes.
This chilling step relaxes gluten, firms the butter, and makes the dough easier to roll without tearing.
7. Rolling Out the Perfect Dough
Rolling requires finesse and patience. A smooth, even dough ensures consistent baking.
- Always lightly flour the surface, too much will dry out the dough.
- Roll from the center outward, rotating frequently.
- Avoid pressing too hard; use gentle, even pressure.
- If the dough warms, refrigerate briefly before continuing.
In pastry dough preparation, rolling is more about technique than strength. The goal is a uniform thickness with visible butter streaks, that’s where the flakiness lives.
8. Types of Pastry Doughs and Their Characteristics
Each type of pastry dough has its own preparation method and texture profile. Knowing the difference is essential to mastering this craft.
1. Shortcrust Pastry:
- Uses minimal liquid and gentle handling.
- Ideal for pies and tarts.
- Texture: crumbly and tender.
2. Puff Pastry:
- Involves folding and rolling butter layers repeatedly.
- Requires precision and chilling between folds.
- Texture: light, airy, and flaky.
3. Choux Pastry:
- Cooked on the stove before baking.
- Steam-puffed rather than layered.
- Used for éclairs and cream puffs.
4. Filo (Phyllo) Pastry:
- Paper-thin layers brushed with butter.
- Common in Mediterranean desserts like baklava.
Each type showcases a unique expression of pastry dough preparation, blending science, skill, and artistry.
9. Common Pastry Mistakes and How to Avoid Them
Even experienced bakers face challenges. Recognizing pitfalls early can save a batch of dough:
- Is the dough too tough? You may have overworked it. Next time, mix minimally.
- Shrinking crusts? The dough didn’t rest long enough. Chill it longer before baking.
- Soggy bottom? Blind bake crusts or use a preheated baking sheet for pies.
- Butter leaking out? The dough got too warm, keeping it cold between steps.
Remember, every baking mistake is a lesson in the art of pastry dough preparation. Precision and patience are your best tools.
10. The Art of Lamination: Creating Flaky Layers
Lamination, the process of folding butter into dough multiple times, is what gives puff pastry its airy lift.
In classic pastry dough preparation, this involves:
- Enclosing a butter block inside the dough.
- Rolling it into a rectangle.
- Folding it into thirds (like a letter).
- Chilling, then repeating the process several times.
Each fold multiplies layers exponentially. After six turns, you can have over 700 layers of dough and butter! The result: breathtaking flakiness and melt-in-the-mouth texture.
11. Baking: From Dough to Golden Perfection
The final step is where transformation happens. During baking, butter melts and creates steam; gluten structures solidify; sugars caramelize to give that golden color and irresistible aroma.
- Temperature: Start high (around 400°F / 200°C) to create lift, then reduce slightly.
- Timing: Avoid opening the oven early, trapped steam is crucial.
- Finishing touches: Brush with egg wash for gloss, sprinkle sugar for sweetness, or sea salt for contrast.
When executed perfectly, pastry dough preparation rewards you with layers so light they seem to float.
12. Elevating Your Skills: Practice, Patience, and Precision
Just as music or painting, pastry-making is full of repetition and perfection. With every order you take, your instincts get sharper, how the dough ought to feel, when the butter is just right, and how long it ought to rest.
So that you can prepare your pastry dough better:
- Test various fats and flours.
- Record a baking journal on ratios and results.
- Observe the behaviour of dough at humidity and temperature.
Knowing how to cook rather than learning recipes is the true mastery of the trade.
FAQs
1. Why does pastry dough need to rest?Resting allows gluten strands to relax and butter to re-solidify. This prevents shrinkage during baking and improves texture.
2. Can I use margarine instead of butter?Yes, but results may differ. Margarine lacks the rich flavor and steam-generating water of butter, so pastries may be softer and less flaky.
3. How long can pastry dough be stored?Wrapped tightly, it can be refrigerated for 2–3 days or frozen for up to 3 months. Thaw in the refrigerator before use, never at room temperature.
The Art and Science of Perfect Pastry
Learning how to make pastry dough is not about precision, but rather knowing. When you understand how all ingredients work and how they interact, then you will bake by choice, not by luck.
Each layer of flake, each buttery crumb, speaks of equilibrium, between heat and cold, patience and precision, art and science.
The next time you roll out the dough, then, bear in mind that you are not simply baking, you are creating edible architecture, an edible architecture made of love and accuracy. Always remember to make your butter cold, your oven hot and your spirit creative and you will never have to be afraid of pastry anymore.